How to prepare sticker artwork for print
Supplying clear artwork helps your stickers print more accurately, look more professional and move through production with fewer questions.
Sticker artwork for print
Whether you need product labels, packaging stickers, waterproof stickers, die cut stickers, kiss cut stickers or general business stickers, a well prepared file gives the best starting point.
This guide explains how to prepare sticker artwork before sending it to Printmonster. It is written for local businesses, tradespeople, makers, schools, clubs and organisations across the West Midlands who want practical artwork guidance without confusing technical language.
If you are unsure about your file, do not worry. Send us what you have and our team will be happy to advise before printing.
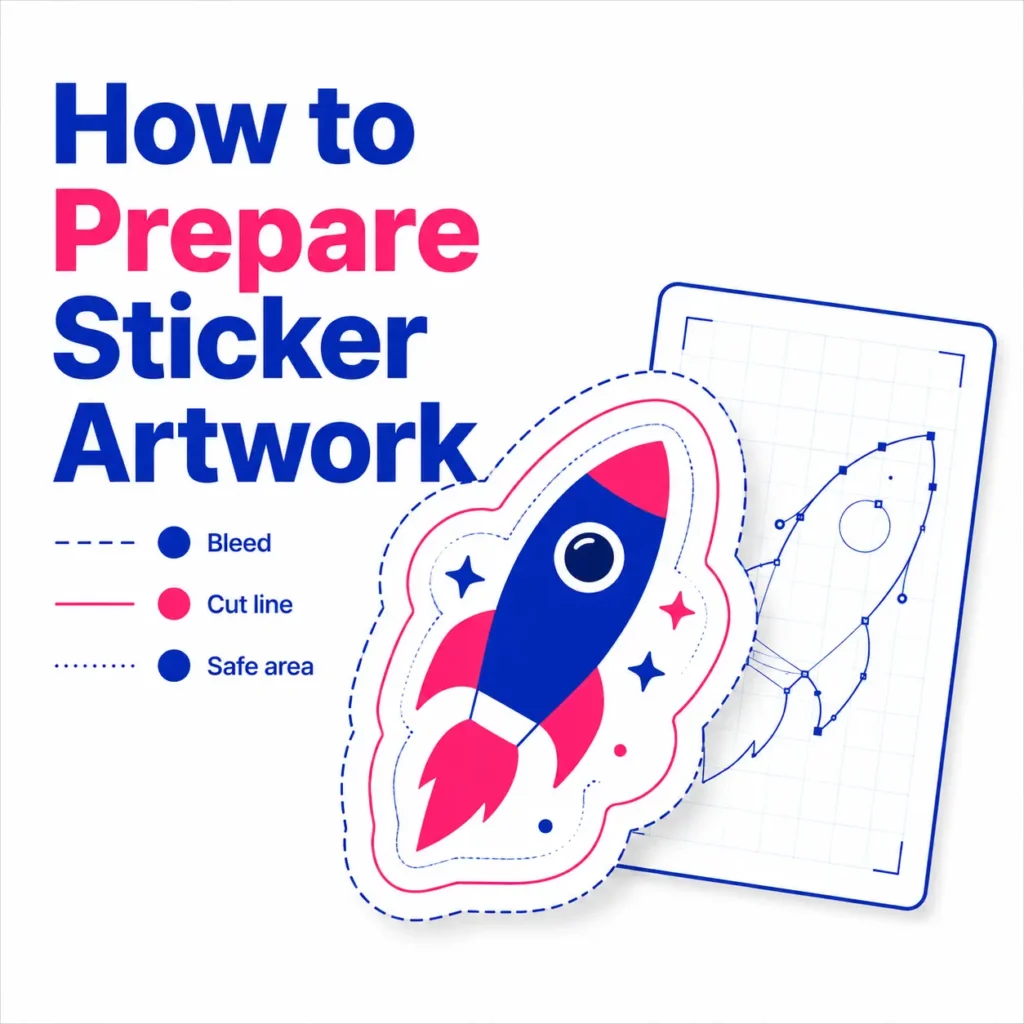
How to set up sticker artwork correctly
Start by deciding the final size of your sticker. This should be the size you want the finished sticker to be, not just the size of the design on screen. For example, if you want a 75 mm round sticker, your artwork should be created at that finished size, with extra bleed added around the edge where needed.
Your design should also include enough space around important text, logos and details. This is known as the safe area. Keeping important parts of the design away from the edge helps prevent anything from looking too close to the cut line.
Before sending your artwork, check:
Your sticker size is clear.
The design is supplied at the correct scale.
Important text is not too close to the edge.
The file is not blurry or pixelated.
Any cut shape is clearly explained.
The quantity and material choice are included with your enquiry.
This is especially useful for custom stickers, product labels and shaped stickers, where size and cutting details matter.
Use the right file type for sticker printing
The best file type for most sticker artwork is a print ready PDF. A high quality PDF helps preserve text, layout, images and artwork settings in one file.
Vector files are also useful, especially for logos, icons, simple illustrations and cut lines. These may be supplied as AI, EPS or PDF files, depending on how the artwork was created. Vector artwork can be scaled cleanly without becoming blurry.
JPEG and PNG files can sometimes be used, but they need to be high resolution. A small image taken from a website, social media post or screenshot is usually not suitable for print because it may appear soft or pixelated when printed.
If you are not sure which file to send, include the best version you have and ask Printmonster to check it before production.
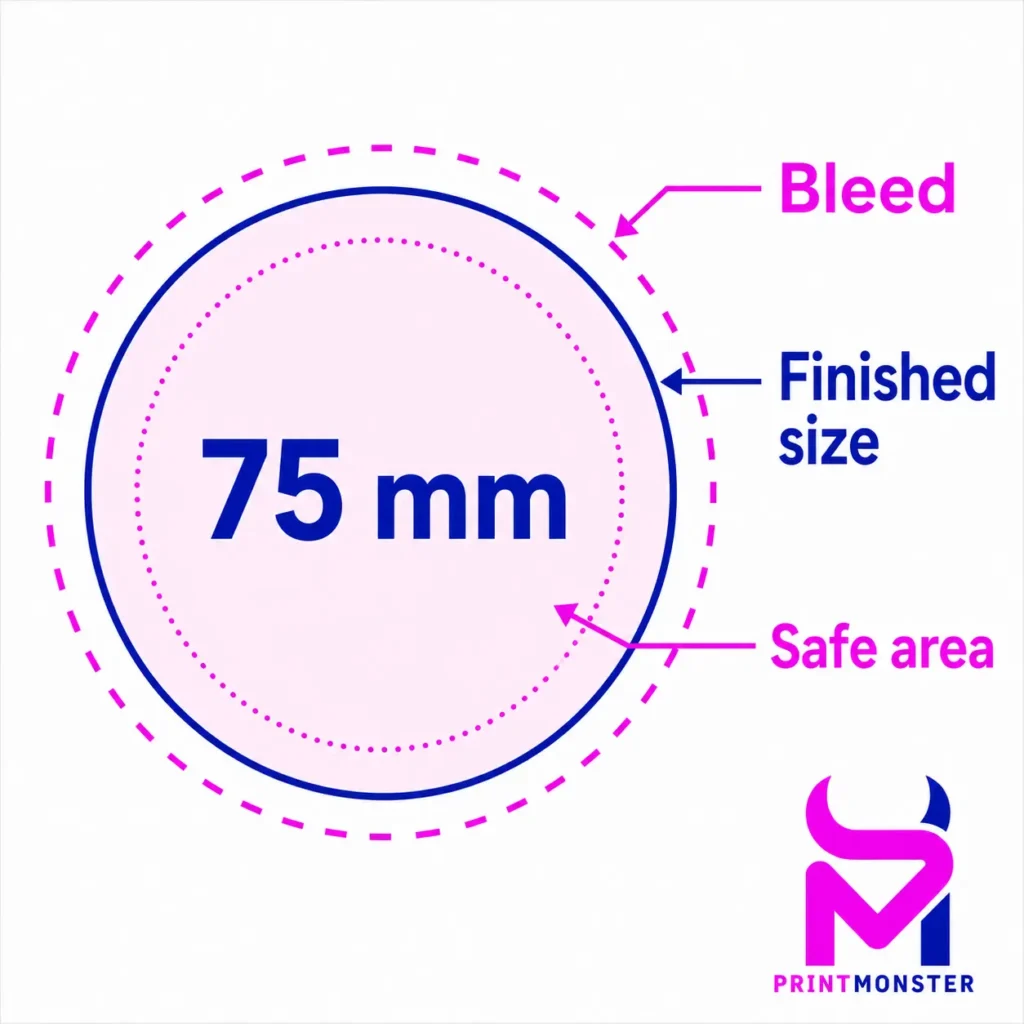
Add bleed and safe areas to your sticker design
Bleed is extra artwork that extends beyond the finished sticker edge. It gives a small margin for movement when the stickers are cut. Without bleed, there is a greater chance of tiny white edges appearing around the finished sticker.
As a simple guide, artwork that goes right to the edge of the sticker should extend slightly past the cut edge. Text, logos and important details should stay inside the safe area, away from the edge.
For example, if your sticker has a coloured background, pattern or image that reaches the edge, that background should continue beyond the finished size. However, your logo, website address, ingredients, contact details or small text should sit comfortably inside the edge.
This is important for both standard sticker shapes and custom shaped stickers.
Check image quality before sending artwork
Low quality images are one of the most common sticker artwork problems. A design can look acceptable on a phone or laptop screen but still be too low resolution for print.
Before sending your sticker artwork, zoom in on the file and check whether the text, logo or image edges look sharp. If the artwork looks fuzzy, jagged or stretched on screen, it may also print that way.
As a general rule, original artwork files are better than screenshots, copied images or files saved from messaging apps. If you have a logo, try to send the original logo file rather than a photo of it.
If you are not sure which version is best, send the files you have and ask Printmonster to check them.
How cut lines work for shaped stickers
If you are ordering die cut stickers or custom shaped labels, the cut line tells us where the sticker should be cut. This is usually shown as a separate outline around the design.
The cut line should be smooth, clear and not too close to important details. Very complicated shapes, sharp points or tiny cut areas can make the sticker harder to produce cleanly, so it is often better to keep the outline practical.
For kiss cut stickers, the sticker itself is cut through the vinyl or label material, while the backing sheet stays in place. For die cut stickers, the sticker and backing are usually cut to shape together. If you are unsure which option is best, Printmonster can advise based on how the stickers will be used.
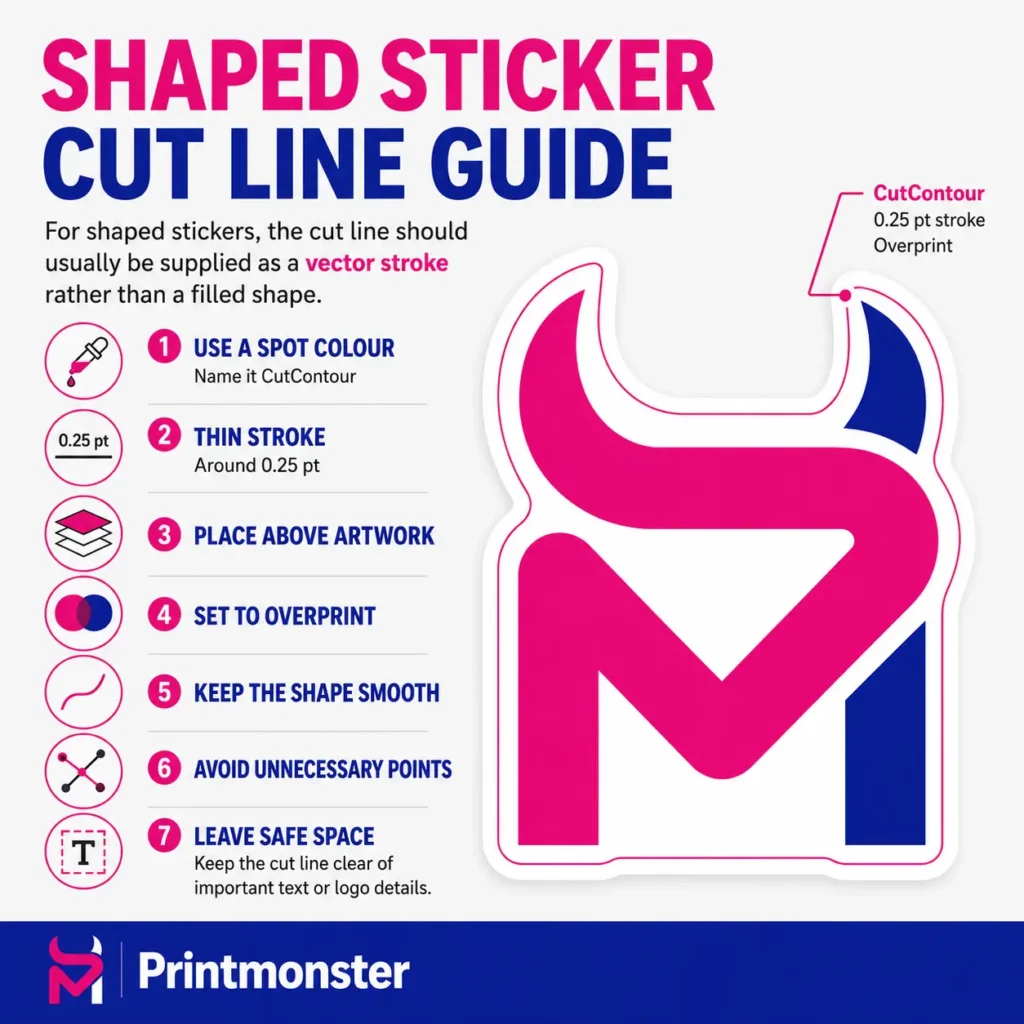
Basic cut line setup for sticker artwork
For shaped stickers, the cut line should usually be supplied as a vector stroke rather than a filled shape. As a general guide, create the outline as a spot colour named CutContour, use a thin stroke of around 0.25 pt, place it above the artwork and set it to overprint.
Keep the shape smooth, avoid unnecessary points and leave enough safe space between the cut line and any important text or logo details.
If you are unsure how to set this up, send your artwork to Printmonster and tell us what shape you would like. Our team can check the file and advise what is needed before printing.
Choosing colours for printed stickers
Colours can look different on screen compared with print. Screens use light, while printed stickers use ink or toner on a physical material. This means very bright colours, subtle shades and gradients may not look exactly the same once printed.
To help avoid surprises, use clear, consistent colours in your artwork and avoid relying on screen brightness. If your sticker needs to match a brand colour closely, mention this when sending your enquiry.
The sticker material can also affect the finished appearance. For example, clear stickers, waterproof stickers, paper labels and vinyl stickers can all give a different look and feel. If the finish matters, ask for advice before ordering.
Common sticker artwork mistakes to avoid
A few simple checks can prevent common sticker artwork problems.
Avoid sending screenshots instead of proper artwork files. Avoid placing text too close to the edge. Avoid using tiny text that will be hard to read once printed. Avoid stretching logos or images to fit the shape. Avoid sending artwork without confirming the finished size.
It is also helpful to explain how the stickers will be used. Stickers for packaging, outdoor use, product labels, equipment labels, events and promotions may need different materials or finishes.
The more information you provide at the start, the easier it is for Printmonster to guide you towards the right option.
Need help with sticker artwork?
You do not need to be a designer to order custom stickers. If you have print ready artwork, you can send it over for checking. If you only have a rough idea, logo or existing file, Printmonster can help you understand what is needed next.
We produce stickers and labels for local businesses across Cannock, Walsall, Wolverhampton, Lichfield, Stafford, Birmingham and the wider West Midlands. From product labels and waterproof stickers to shaped stickers and promotional labels, our team can help you prepare your artwork and choose the right print option.
Contact Printmonster for help with your sticker artwork, file setup or custom sticker enquiry.
Sticker artwork FAQ
What file type should I send for sticker artwork?
A print ready PDF is usually the best option. Vector files such as AI, EPS or PDF files are also helpful for logos, cut lines and scalable artwork. High resolution JPEG or PNG files may be usable, but screenshots and small web images are usually not suitable.
Do I need bleed on sticker artwork?
Yes, if your design goes right to the edge of the sticker. Bleed gives extra artwork beyond the finished edge, which helps prevent unwanted white edges after cutting.
What is a safe area on sticker artwork?
The safe area is the space inside the sticker edge where important text, logos and details should sit. Keeping key details away from the edge helps the finished sticker look neat and easy to read.
How should I create a cut line for shaped stickers?
For shaped stickers, the cut line should usually be a vector stroke, not a filled shape. As a general guide, use a spot colour named CutContour, set the stroke to around 0.25 pt, place it above the artwork and set it to overprint.
Can Printmonster check my sticker artwork before printing?
Yes. Send your artwork, size, quantity and sticker type, and Printmonster can advise if anything needs adjusting before production.
Can I send a logo from my website for sticker printing?
Sometimes, but website logos are often too small for print. The original logo file is usually better. If you are unsure, send what you have and ask us to check it.
Do shaped stickers need a cut line?
Yes, custom shaped stickers usually need a clear cut line so the shape can be followed accurately. If you do not have one, Printmonster can advise what is needed.
What information should I include when sending sticker artwork?
Include the finished sticker size, quantity, material preference, shape, intended use and your artwork file. If the sticker needs to be waterproof, used outside or applied to packaging, mention this in your enquiry.
Need help preparing your sticker artwork?
Send your artwork, size, quantity and sticker requirements to Printmonster. Our friendly team can check your file, advise on setup and help you choose the right sticker or label option for your business.