Bleed, Crop Marks and Safe Areas Explained
Introduction
When you send artwork for print, you may be asked to include bleed, crop marks or a safe area. These terms can sound technical at first, but they are simply there to help your printed items finish neatly and accurately.
This bleed, crop marks and safe area guide explains what each term means, why it matters and how to prepare your artwork before sending it to Printmonster. It is useful for leaflets, flyers, business cards, stickers, posters, booklets, banners, signage and many other printed products.
Printmonster works with local businesses, tradespeople, schools, clubs, event organisers and organisations across the West Midlands, so we know that not every customer is a designer. This guide is written in plain English to help you avoid common artwork problems and get better results from your print.
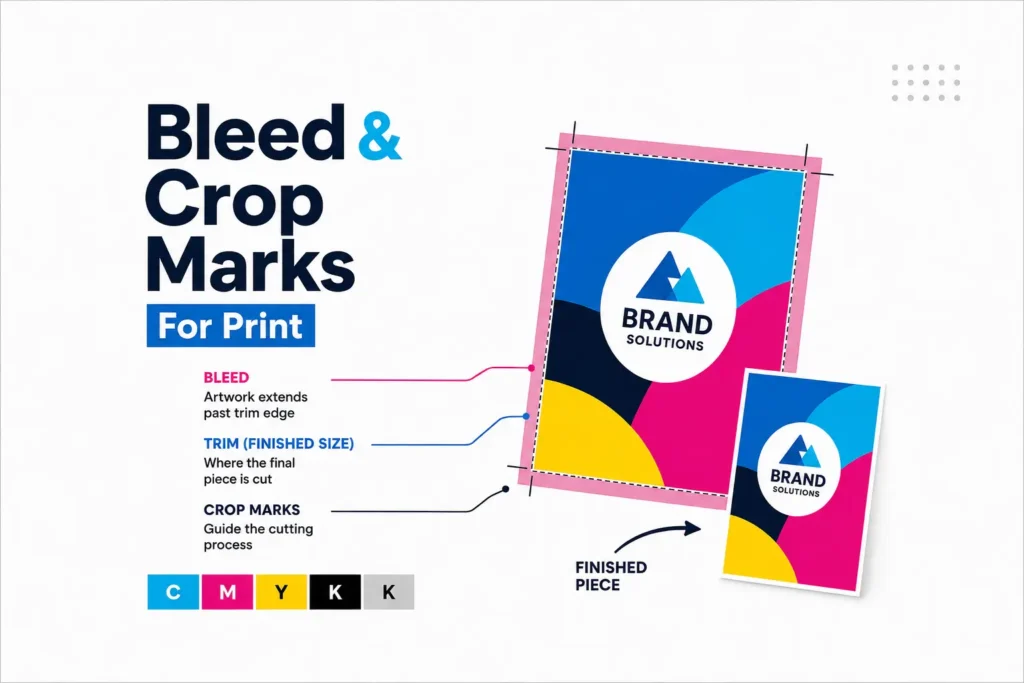
What does bleed mean in printing?
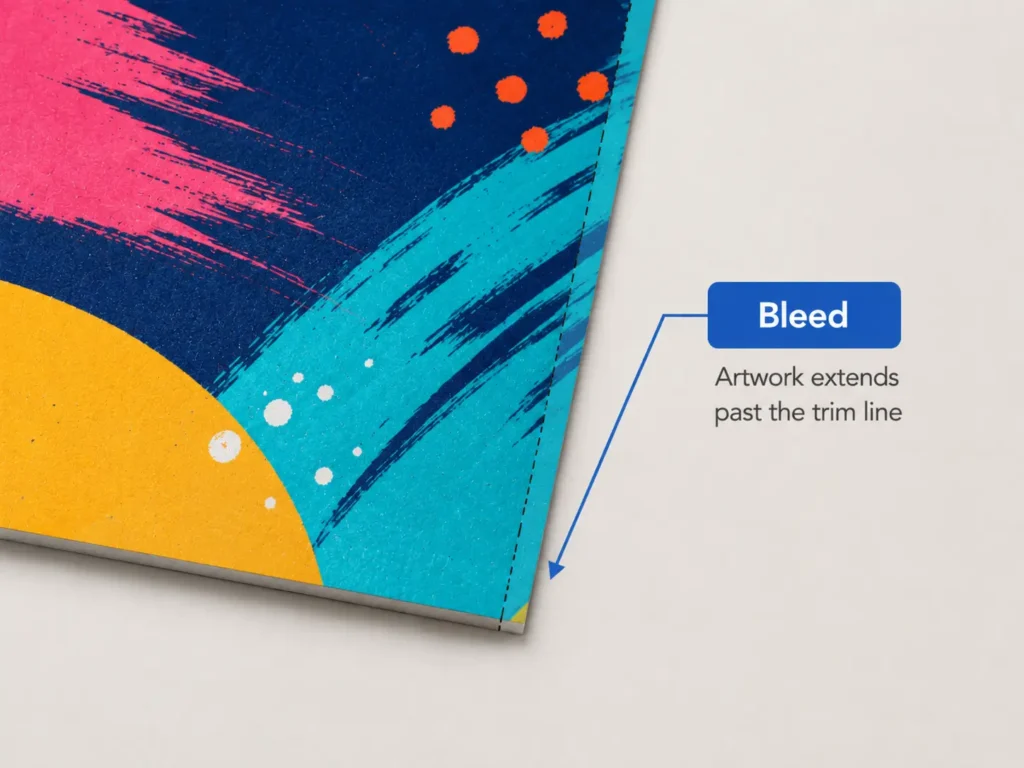
Bleed is the extra artwork that extends beyond the final cut edge of your design.
For example, if your flyer has a coloured background, photo or pattern that goes right to the edge, that background needs to continue slightly past the finished size. This extra area is called bleed.
Bleed is needed because printed sheets are trimmed after printing. Even with accurate cutting equipment, there can be tiny movement during trimming. Without bleed, you may end up with an unwanted white edge around your finished print.
A simple way to think about bleed is this:
Your design continues past the edge so the cutter has a little extra artwork to trim through.
This helps printed items look clean, professional and properly finished.
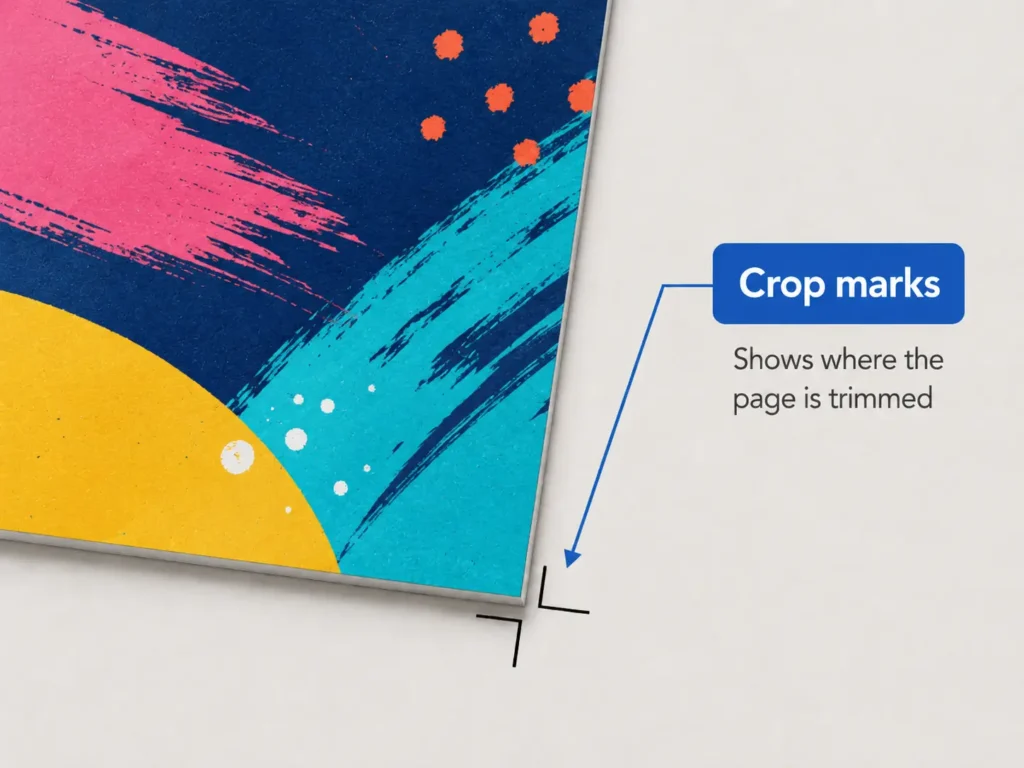
What are crop marks?
Crop marks are small lines placed outside the artwork to show where the print should be trimmed.
They do not appear on the finished design because they sit outside the final printed area. Instead, they act as a guide for cutting.
Crop marks are especially useful for flat printed items such as business cards, leaflets, flyers, appointment cards, compliment slips, booklet covers and presentation folders. They help show the final size of the job once the bleed has been trimmed away.
In most design software, crop marks can be added when you export your artwork as a print ready PDF. However, not every file needs crop marks, and some online design tools may not export them properly. If you are unsure, send your file to Printmonster and we can advise before printing.
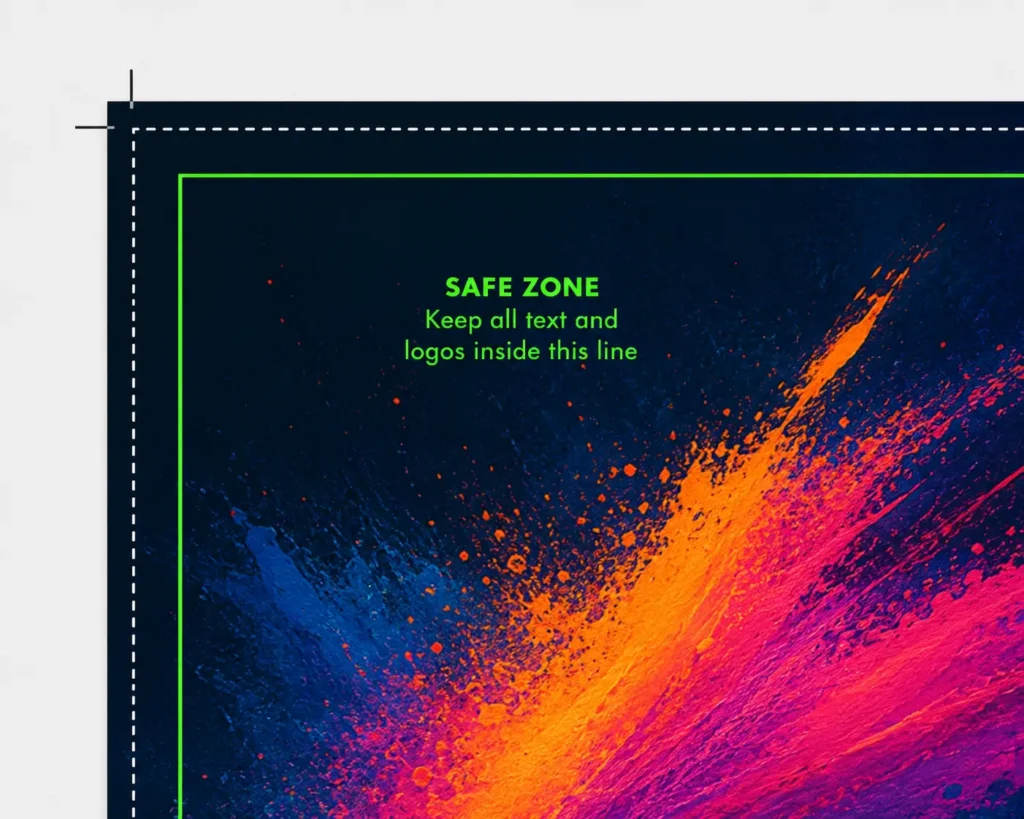
What is the safe area?
The safe area is the space inside the trim edge where important content should stay.
This includes text, logos, phone numbers, email addresses, QR codes, social media handles and any important design details. Keeping these items away from the edge reduces the risk of them being trimmed too close.
The safe area is sometimes called the margin, quiet area or safe zone.
As a general rule, keep important content at least a few millimetres inside the finished edge. For larger print, signage and display graphics, you may need a larger safe area because the print is bigger and viewed differently.
For example, a business card may only need a small safe area, while a roller banner, foamex sign or large poster may need more space around the edges to keep the design looking balanced and readable.
Why are bleed and safe areas important?
Bleed and safe areas help prevent common print issues.
Without bleed, you may see thin white edges where the artwork stops before the trim line. This is most noticeable when your design has a coloured background or image running to the edge.
Without a safe area, important text or logos can sit too close to the cut edge. This can make the design look cramped or, in the worst case, risk part of the content being trimmed.
Good artwork setup helps with:
Cleaner trimming
More professional looking print
Better spacing around text and logos
Fewer artwork delays
Less risk of unexpected results
A smoother print process
This is especially important for marketing materials, business stationery, stickers and display print, where the finished item needs to represent your business clearly.
How much bleed should I add?
For many standard printed items, a common bleed amount is 3 mm on each edge. This means your background or edge design should extend 3 mm beyond the final finished size.
For example, if your finished flyer is A5 size, the artwork file should include an extra 3 mm on the top, bottom, left and right edges.
However, bleed requirements can vary depending on the product, material and print method. Large format printing, signage, banners, stickers and specialist items may need different setup requirements.
A helpful rule is:
Do not guess if the job is unusual. Ask before setting up the artwork.
Printmonster can advise on artwork setup for many products, including custom stickers, posters, banners, business cards, booklet printing, signs, roller banners and vehicle graphics.
Artwork setup checklist
Before sending your artwork to print, check the following:
Your file is the correct finished size.
Bleed has been added where artwork runs to the edge.
Important text, logos and QR codes sit inside the safe area.
Images are clear and high enough quality for the print size.
Colours, backgrounds and photos extend into the bleed area where needed.
The file has been exported as a suitable print ready PDF where possible.
Crop marks are included if required.
There are no important design elements sitting too close to the edge.
This is useful whether you are preparing business cards, flyers, leaflets, product labels, waterproof labels, posters, banners, foamex boards, correx signs, dibond signs or booklet artwork.
Common mistakes to avoid
One of the most common mistakes is creating artwork at the finished size with no bleed. It may look fine on screen, but once printed and trimmed, there is no spare artwork at the edges.
Another common issue is placing text too close to the trim line. This can make the design look uneven or difficult to read. It is especially noticeable on small items such as business cards, appointment cards, stickers and labels.
Also, avoid adding your own border too close to the edge unless it has been designed carefully. Borders can make even tiny trimming movement more visible.
Finally, do not rely only on what looks correct on screen. Screens do not show trimming movement, safe areas or print finishing in the same way as a finished physical product.
Need help setting up your artwork?
Not every customer has access to professional design software, and that is completely normal. Printmonster can help check your artwork and advise if something needs changing before print.
If you are ordering printed materials for your business and are unsure about bleed, crop marks, file setup or safe areas, send your artwork over and ask for guidance. Our team can let you know whether the file looks suitable or whether changes are needed.
This is especially helpful for local businesses and tradespeople across Cannock, Walsall, Wolverhampton, Lichfield, Stafford, Birmingham and the wider West Midlands who want print that looks professional without getting lost in technical jargon. Local SEO should be used naturally across resource and service pages, especially for the West Midlands and nearby areas.
You may also find it useful to read our other print resource guides, including how to supply print ready artwork, best file types for printing and vector vs raster artwork.
FAQ
What is bleed in printing?
Bleed is extra artwork that extends beyond the final cut edge of your design. It allows the print to be trimmed cleanly without leaving unwanted white edges.
Do I always need bleed on my artwork?
You usually need bleed if any colour, image, pattern or design element runs to the edge of the finished print. If your design has a plain white border, bleed may be less important, but it is still best to check before printing.
What are crop marks used for?
Crop marks show where the printed item should be trimmed. They sit outside the finished artwork area and are removed during cutting.
What is the safe area in artwork?
The safe area is the space inside the trim edge where important content should stay. Text, logos, phone numbers and QR codes should not sit too close to the edge.
How much bleed should I add for print?
A common bleed amount for many standard print items is 3 mm on each edge. Some products may need different settings, so it is best to ask Printmonster if you are unsure.
Can Printmonster check my artwork before printing?
Yes. If you are unsure whether your artwork has the correct bleed, crop marks or safe area, send it to Printmonster and our team can advise.
Do stickers need bleed?
Yes, stickers often need bleed, especially if the design prints to the edge or follows a custom shape. This helps the finished sticker look neat after cutting.
Do large signs and banners need safe areas?
Yes. Larger print items often need generous safe areas, especially around edges, fixing points, hems or display hardware. This helps keep important text and logos clear and readable.
Need help with your artwork?
If you are not sure whether your file has the correct bleed, crop marks or safe area, send it to Printmonster and our friendly team will be happy to advise. We can help with artwork setup for stickers, signs, leaflets, business cards, booklets, posters, banners and more.